Applications of AI Agents for All Researchers
|
Note
|
This article is a machine translation based on the Japanese page. |
1. Preface
This is the 3rd day article of the SOKENDAI Advent Calendar 2025. I would like to thank Tori-san for organizing this, and everyone involved in the SOKENDAI Advent Calendar.
Hello, I am KeishiS, a Ph.D. student in the Department of Statistical Science at SOKENDAI. Since others seem likely to write about ML research topics, I thought about what would be useful for researchers in all fields. As a result, I arrived at the theme of Creating a Personal Page with AI Agents.
2. Background
Recently, the progress of AI technology has been remarkable, but I get the impression that engineers are the main ones using it heavily. While I want researchers to know its capabilities, it is difficult to introduce it into research activities because it is hard to judge how far it can be used ethically. After thinking about various applications, I thought that creating a personal page would not cause any problems.
- Advantages of a Personal Page
-
All information on the page is public, so there is no problem even if an AI agent reads it.
- Necessity of a Personal Page
-
Everyone has one on researchmap or Google Sites, right? Yes.
This article itself is published on my personal page and is a collaboration with an AI agent. It may not be perfect, but AI agents already have enough ability to create something that works, and especially regarding design, they are better than me.
In this article, I will first organize the functions and content necessary for a researcher’s personal page, then briefly explain the introduction of AI agents, and finally introduce an example of personal page creation. I tried my best to write for non-engineers, but environment setup is the most difficult part of programming, so please forgive me to some extent.
|
Caution
|
This article avoids programming-like editing operations as much as possible, but therefore the quality of the generated product cannot be guaranteed. I hope you take it as an introduction that you can easily do something like this. |
3. Requirements Definition for Personal Page
As a result of identifying the functions and essential content necessary for a researcher’s personal page, I came to the conclusion that the following would be good.
-
Functions
-
Low effort for content creation
-
Multi-language support
-
Responsive design (function to layout without breaking according to screen size)
-
-
Content
-
Profile introduction that can differentiate you
-
Easy-to-read research achievements and career history
-
Links to related external pages (ORCiD, Google Scholar, university lab pages, etc…)
-
-
Optional Requirements
-
Easy to write research introduction articles (cross-references usable, bib files reusable, code display is clean, etc…)
-
Especially multi-language support is important when considering viewing by overseas researchers, and responsive design is essential because viewing on smartphones is mainstream recently instead of PCs. Specific technology selection based on these will be explained in Section 5.
4. Introduction of AI Agents
There is probably no one who has not heard the names of Gemini (Gemini CLI), Claude (Claude Code), or ChatGPT (Codex), but for the work we are doing this time, you can use any of them without problems. Probably the most difficult part is installing the AI agent after preparing these execution environments. Specifically, you need to do the following:
-
Install Node.js: You may see a selection screen for
npm/Yarn/pnpm. Any is fine, but this article assumespnpm. -
Install one of Gemini / Claude Code / Codex based on the information at the link.
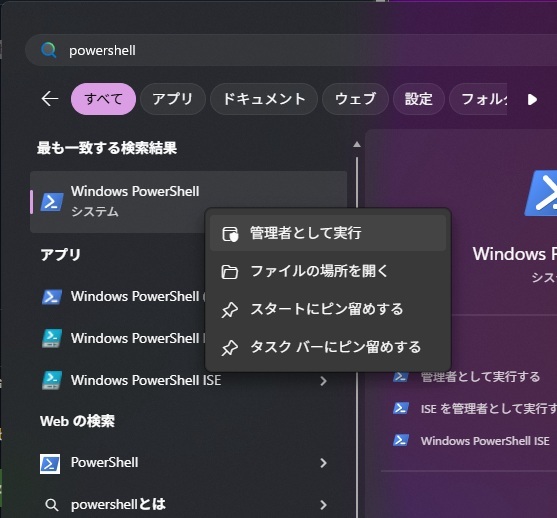
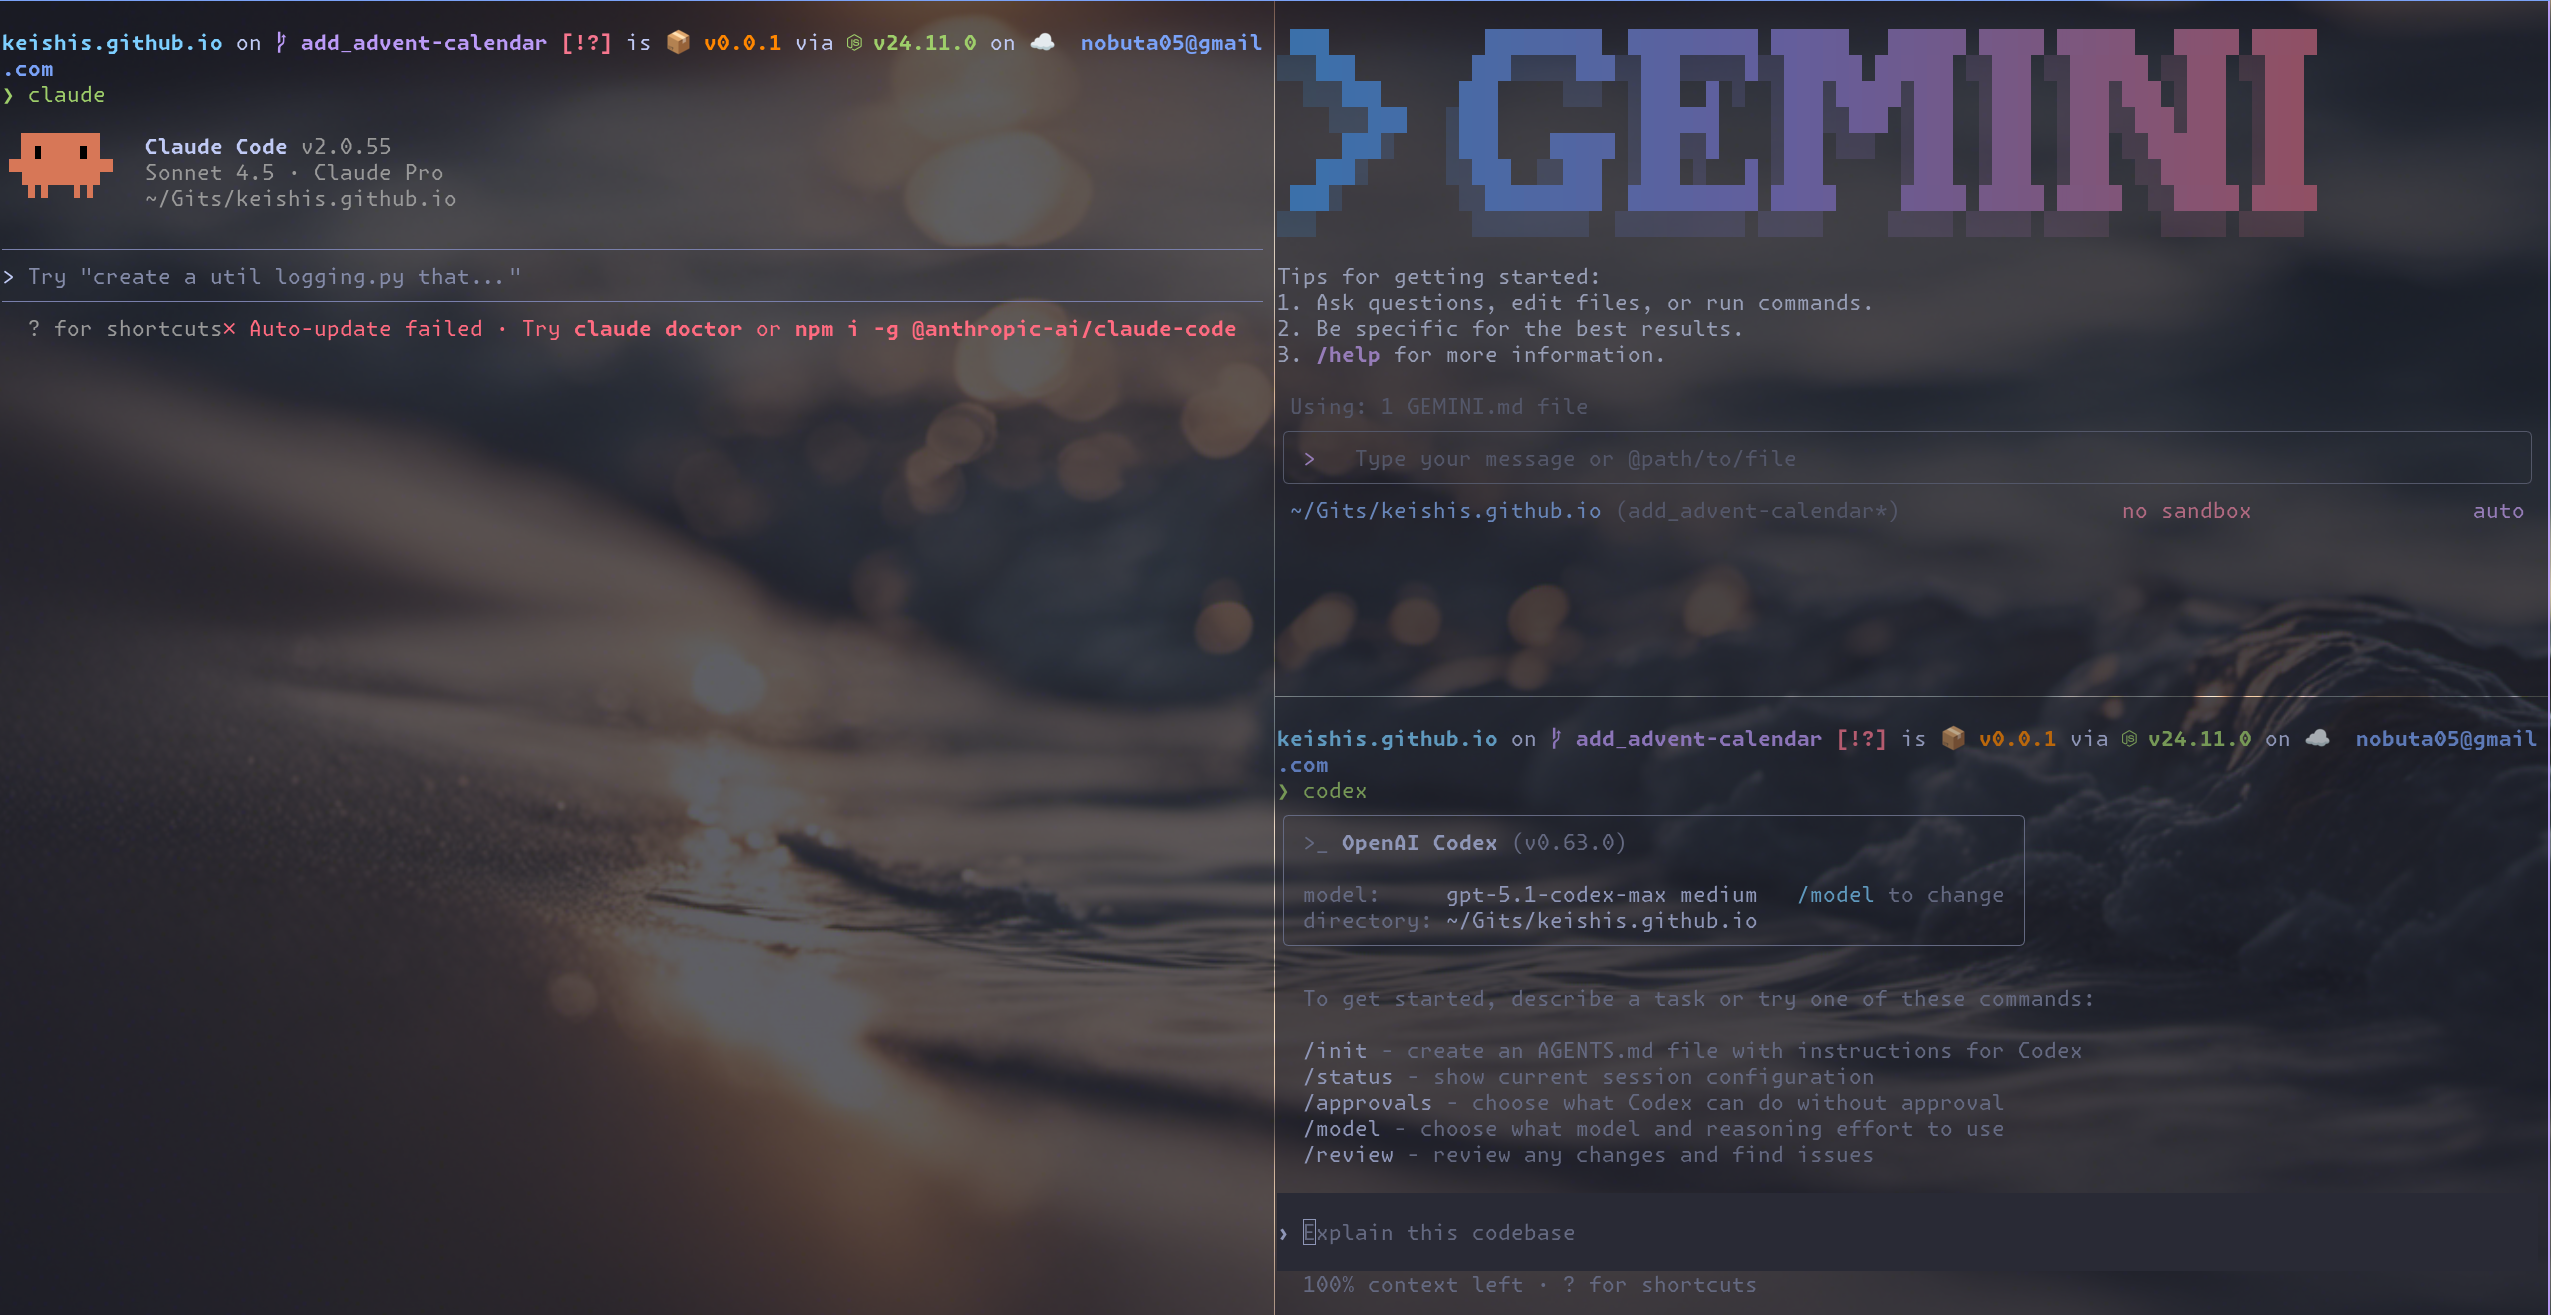
Unfortunately, I don’t have the time to explain each term, so please refer to the installation instructions on each page and try your best while asking ChatGPT on the browser. Windows users may need to install on PowerShell run as administrator (Figure 1) or add the path to environment variables. ChatGPT knows the details. Unfortunately, I don’t have a Mac PC, so I can’t give any advice. Those using Linux distros can probably do it on their own. If you can install it successfully, one of the screens like Figure 2 will be displayed.
5. Technical Introduction of Personal Page
Now, regarding the creation of the personal page, which is the main topic, writing HTML/JavaScript/CSS from scratch is too troublesome. In cases like this where you want to "focus on content creation and leave web page functions to general-purpose tools", it is common to use a tool called a Static Site Generator (SSG).
There are many tools that fall under SSG, and many people around me use Quarto, but here I will use Astro. The main reasons are as follows:
-
Easy multi-language support
-
You can write articles in the recently popular Markdown format [1], and when you want to create a rich page, you can configure the page like HTML with Astro Components.
-
You can collect articles placed in a specific directory (or by tags attached to articles) and automatically generate a listed page (like this one on my personal page).
5.1. Creation of Template Page
Let’s start creating a personal page immediately. If you are on Windows, launch PowerShell, and if you are on Mac/Linux, launch an appropriate terminal software and try running pnpm create astro@latest --template blog. Then you will be asked Where should we create your new project?, so enter an appropriate project name (directory name, here personal-page).
> pnpm create astro@latest --template blog

 astro   Launch sequence initiated.

   dir   Where should we create your new project?
         ./personal-page
      ◼  tmpl Using blog as project template

  deps   Install dependencies?
         Yes

   git   Initialize a new git repository?
         No
      ◼  Sounds good! You can always run git init manually.

      ✔  Project initialized!
         ■ Template copied
         ■ Dependencies installed

  next   Liftoff confirmed. Explore your project!

         Enter your project directory using cd ./personal-page
         Run pnpm dev to start the dev server. CTRL+C to stop.
         Add frameworks like react or tailwind using astro add.

         Stuck? Join us at https://astro.build/chat

╭─────╮  Houston:
│ ◠ ◡ ◠  Good luck out there, astronaut! 🚀
╰─────╯
By the way, the --template blog part can also be changed. For example, it can be used as follows.
Check the license of community-published templates carefully.
-
In the sample templates provided by the official, specify the directory name of the one you want to use from the link.
-
In the templates published by the community, find the one you like from the list and specify the GitHub username/repository name in the form of
--template <username>/<repository name>.
Next, move to the created directory with cd personal-page etc. and run pnpm dev.
┃ Local    http://localhost:4322/
┃ Network  use --host to expose

17:41:36 watching for file changes...
When you access http://localhost:4322 in your browser, the template web page will be displayed.
5.2. Content Editing
Since it is just a template as is, let’s replace the content with your own. Where to modify depends on the template, but in the case of the blog template, for the time being:
-
src/consts.ts: Page name (SITE_TITLE) and simple description (SITE_DESCRIPTION) -
src/pages/{index.astro,about.astro}: Top page and self-introduction page -
Edit/Delete Markdown files under
src/content/blog/ -
Delete image files under
src/assets/ -
Delete
public/favicon.svg
5.3. Customization with AI Agent
Now, it’s time for the main topic, the AI agent. Since the blog template is English only, let’s have it customized so that both Japanese and English can be displayed. Start the AI agent with the working directory moved to ./personal-page/, and give it a prompt like the following, for example.
> Please make this page compatible with Japanese/English based on Astro v5. If a Japanese page does not exist, translate the English article to Japanese and generate it, and delete unnecessary files and descriptions.Then, after reading various files under the directory, it should suggest modifications like "Add description about i18n to `astro.config.mjs`".
Although it may fail with single file modifications, it will automatically cycle through modifications, so please wait for a while. As a result, in my case, the file structure became as follows.
.
├── astro.config.mjs
├── package.json
├── pnpm-lock.yaml
├── public
│   └── fonts
│       ├── atkinson-bold.woff
│       └── atkinson-regular.woff
├── README.md
├── src
│   ├── assets
│   ├── components
│   │   ├── BaseHead.astro
│   │   ├── Footer.astro
│   │   ├── FormattedDate.astro
│   │   ├── Header.astro
│   │   └── HeaderLink.astro
│   ├── consts.ts
│   ├── content
│   │   └── blog
│   │       ├── en
│   │       │   ├── first-post.md
│   │       │   ├── markdown-style-guide.md
│   │       │   ├── second-post.md
│   │       │   └── third-post.md
│   │       └── ja
│   │           ├── first-post.md
│   │           ├── markdown-style-guide.md
│   │           ├── second-post.md
│   │           └── third-post.md
│   ├── content.config.ts
│   ├── i18n
│   │   ├── ui.ts
│   │   └── utils.ts
│   ├── layouts
│   │   └── BlogPost.astro
│   ├── pages
│   │   ├── en
│   │   │   ├── about.astro
│   │   │   ├── blog
│   │   │   │   ├── index.astro
│   │   │   │   └── [...slug].astro
│   │   │   └── index.astro
│   │   ├── index.astro
│   │   ├── ja
│   │   │   ├── about.astro
│   │   │   ├── blog
│   │   │   │   ├── index.astro
│   │   │   │   └── [...slug].astro
│   │   │   └── index.astro
│   │   └── rss.xml.js
│   └── styles
│       └── global.css
└── tsconfig.json
The structure may differ depending on the person, but it should be roughly like this.
Finally, execute pnpm build and if there are no errors, and when viewed with pnpm dev, both Japanese/English pages are displayed correctly, it is OK.
5.4. Procedures for Public Release
The reason you can view it from a browser by executing pnpm dev is that your local PC is acting as a server, and the browser is accessing the server running on your local PC.
localhost in http://localhost:4322/ refers to your local PC.
Therefore, to make it viewable by everyone, you need to upload the files under dist/ to a server that is open to the Internet. There are multiple ways, but since we are at it, I will introduce the method using GitHub.
- GitHub
-
Generally known as a service for managing source code of programs, but most text data can be uploaded, and it also provides GitHub Pages, a function to publish web pages.
If you want to publish a web page seriously, it is better to read the official documentation, but for those who want to try it for the time being, the following procedure is sufficient.
5.4.1. GitHub Account Creation
If you are a first-time user, access GitHub and create an account from Sign up on the top right. If you register by linking with a Google or Apple account, there are fewer input items.
5.4.2. Repository Creation
GitHub manages one project in a unit called a repository. So let’s jump to the repository creation page.
-
Click the account icon on the top right of the page and press
Repositories -
Press the New button on the top right of the page (Figure 3)
-
You will transition to the
Create a new repositorypage, but here there is 1 place to input and 1 place to check.-
Enter the repository name in the
Repository namefield. Basically, use<username>.github.io. For example, if the account name isnobuta05, usenobuta05.github.io. -
Check that the value of
Choose visibilityisPublic. This is a setting to make the contents of the repository viewable by anyone, but since a personal page is originally created for the premise of being public, there is no problem.
-
-
You do not need to change the remaining items. Press the Create repository button at the bottom of the page.
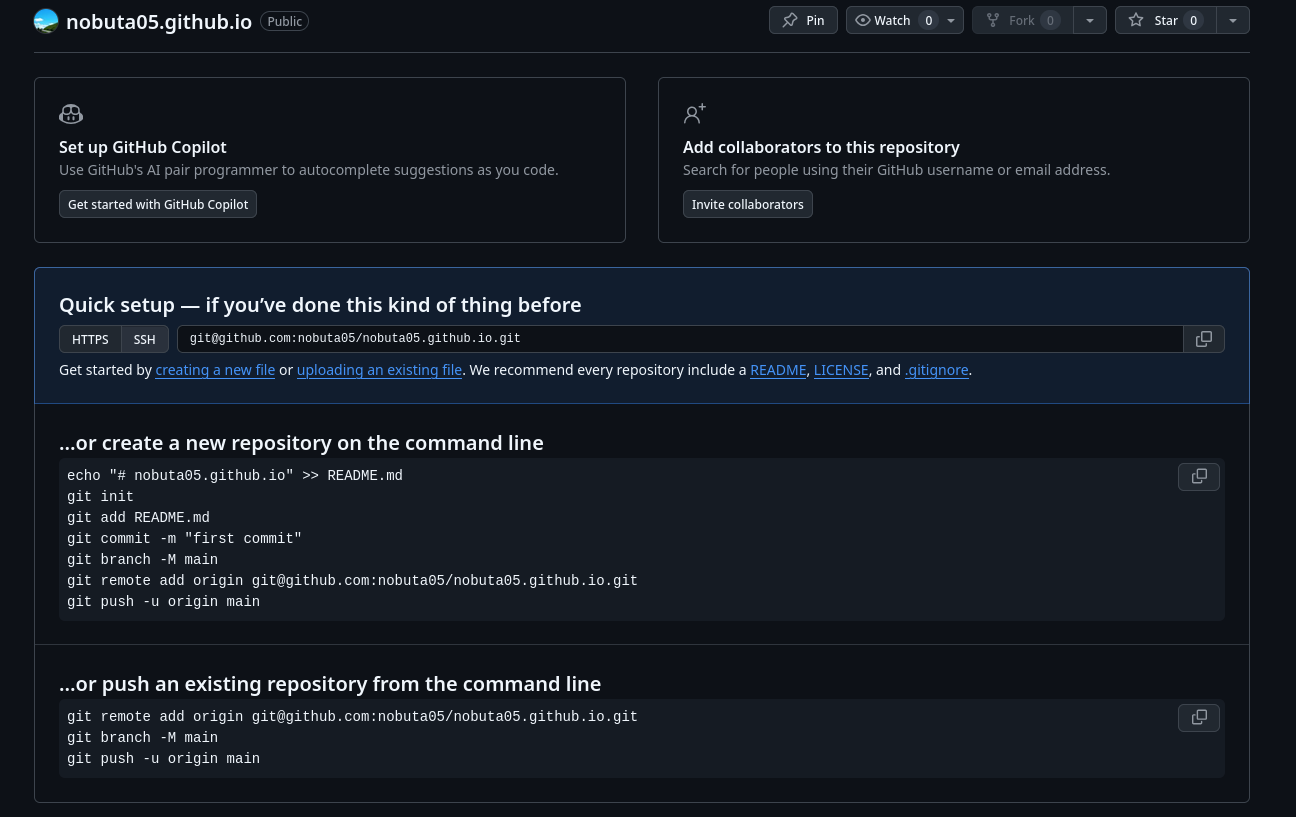
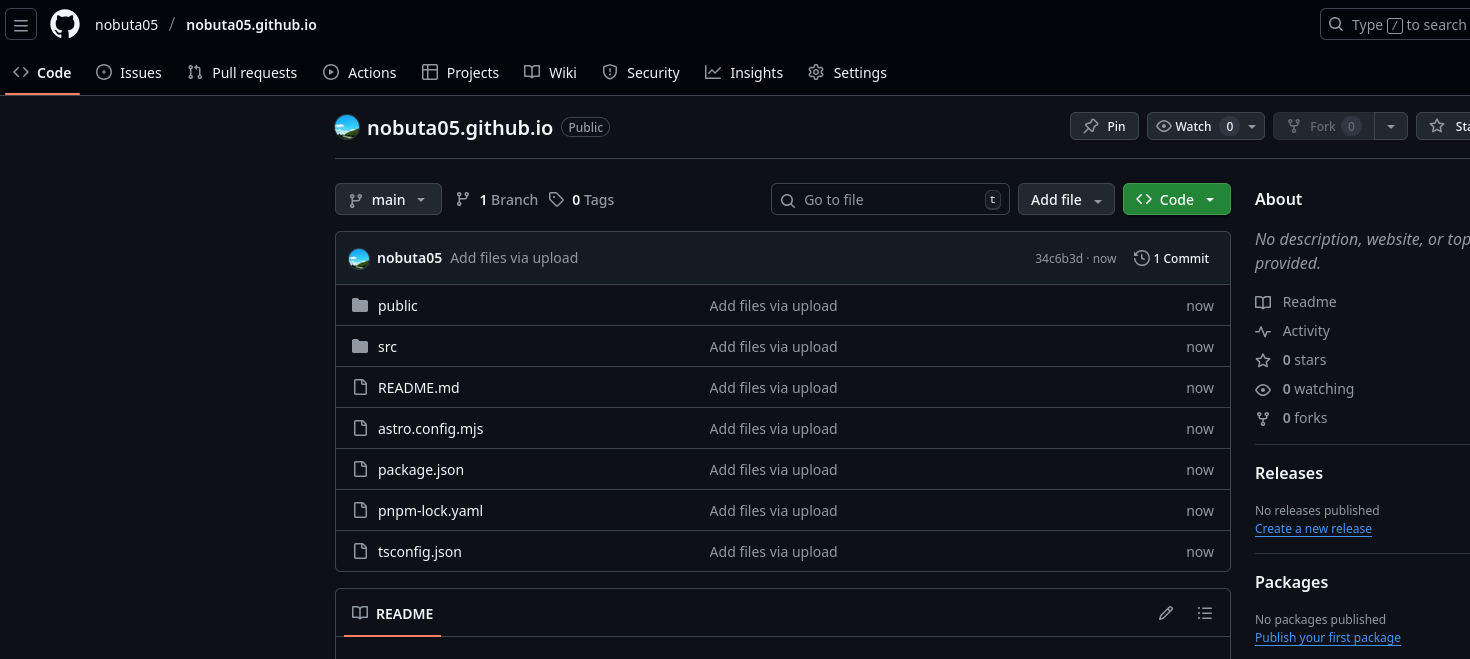
Then you will be transitioned to a page like Figure 4, and various instructions are written, but you can ignore most of them.
Since we will perform the upload operation with GUI this time, press the uploading an existing file link near the center of the page.
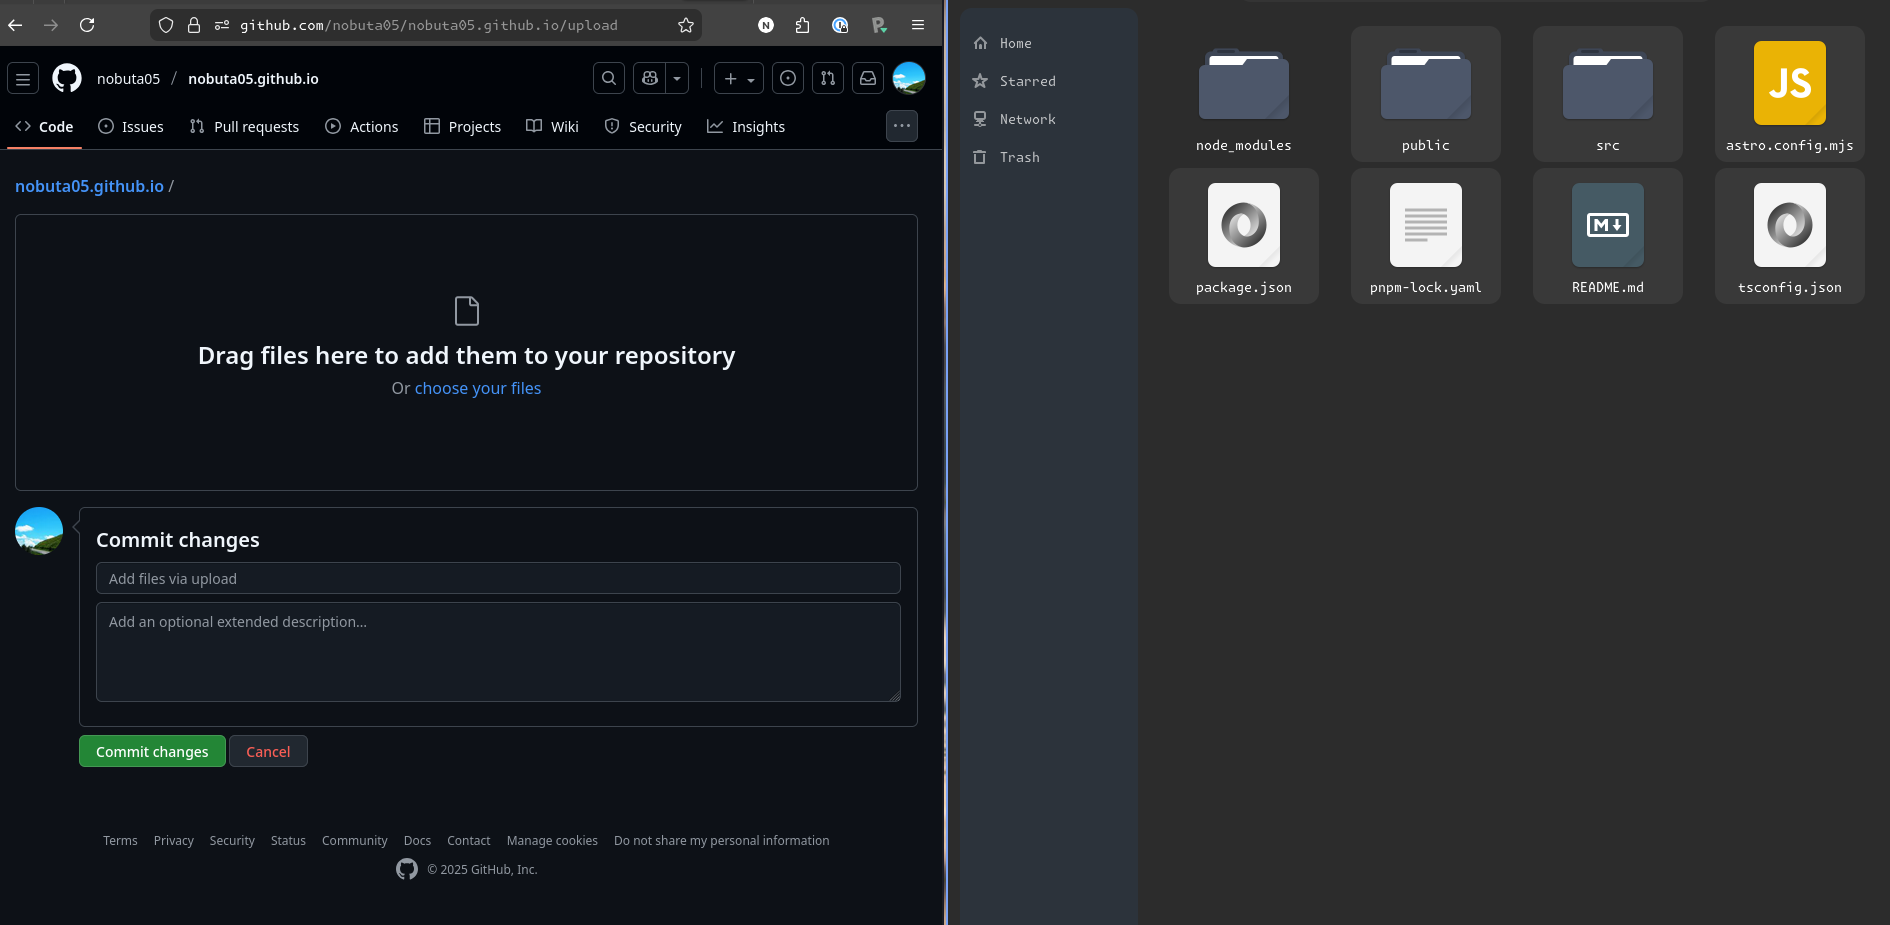
Then you will transition to a screen like the left half of Figure 5, so drag and drop the files created with the template + edited to the part Drag files here to add them to your repository. At that time, please upload everything except node_modules/ as shown in the image.
The comment part can be left blank, so press the Commit changes button.

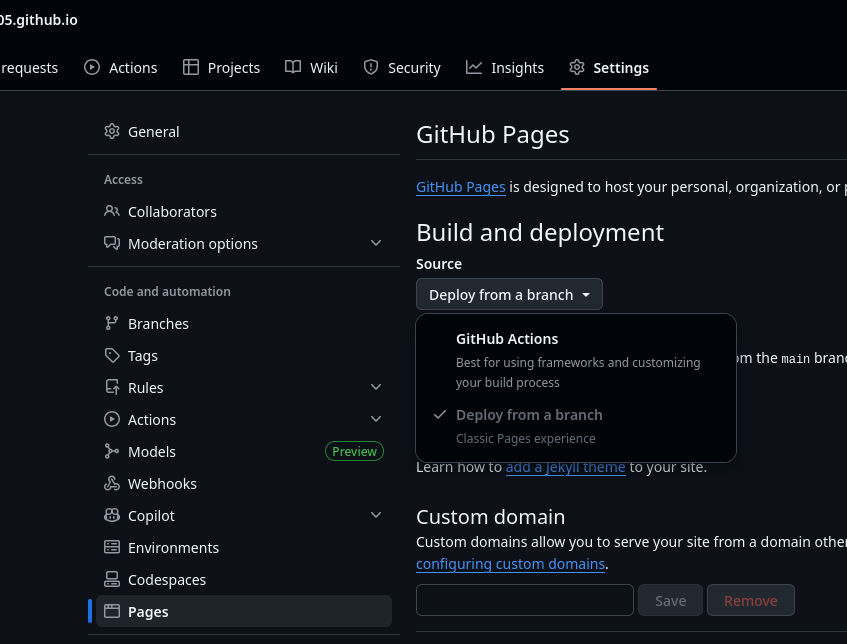
5.4.3. Changing Repository Settings for GitHub Pages
Next, change one repository setting to enable GitHub Pages settings.
These are the only items to change from the setting items. Press the Code tab on the far left of the tabs lined up at the top to return to the top page.
5.4.4. Generating GitHub Actions Configuration File
Here, return to the AI agent and have it generate the necessary configuration files. Give a prompt like the following.
> Please add settings to deploy the artifacts generated by `pnpm build` as github pages via github actions.Then, although the file name and its contents may differ slightly, a file called .github/workflows/deploy.yml will be generated, and it will probably teach you some procedure. In my case, it was content like Code 1.
Deployment Procedure

  1. Update astro.config.mjs

  // For user/organization page (username.github.io):
  site: 'https://username.github.io'

  // For repository page (username.github.io/repo-name):
  site: 'https://username.github.io/repository-name'
  base: '/repository-name'  // Add this line too

  2. GitHub Repository Settings

- Change Settings → Pages → Source to "GitHub Actions"name: Deploy to GitHub Pages
on:
# Trigger on push to main branch
push:
branches: [main]
# Manual execution from GitHub UI is also possible
workflow_dispatch:
# Allow deployment to GitHub Pages
permissions:
contents: read
pages: write
id-token: write
# Limit concurrency to 1 (do not cancel ongoing deployments)
concurrency:
group: "pages"
cancel-in-progress: false
jobs:
build:
runs-on: ubuntu-latest
steps:
- name: Checkout
uses: actions/checkout@v4
- name: Setup pnpm
uses: pnpm/action-setup@v4
with:
version: 9
- name: Setup Node
uses: actions/setup-node@v4
with:
node-version: 20
cache: 'pnpm'
- name: Setup Pages
id: pages
uses: actions/configure-pages@v5
- name: Install dependencies
run: pnpm install
- name: Build with Astro
run: pnpm build
- name: Upload artifact
uses: actions/upload-pages-artifact@v3
with:
path: ./dist
deploy:
environment:
name: github-pages
url: ${{ steps.deployment.outputs.page_url }}
needs: build
runs-on: ubuntu-latest
steps:
- name: Deploy to GitHub Pages
id: deployment
uses: actions/deploy-pages@v45.4.5. Uploading GitHub Actions Configuration File
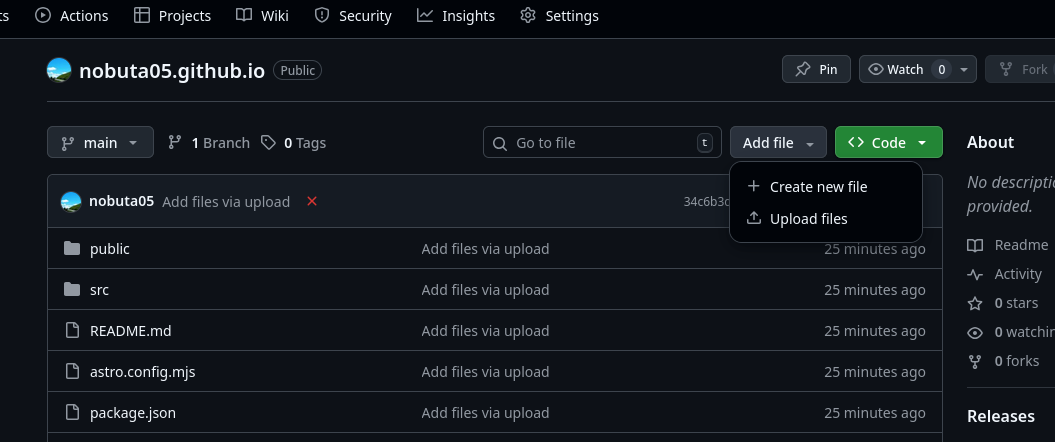
Finally, let’s upload the generated .github/workflows/deploy.yml to the repository.
-
Press the Add file button on the repository top page as in Figure 8
-
Press the Create new file button that appears
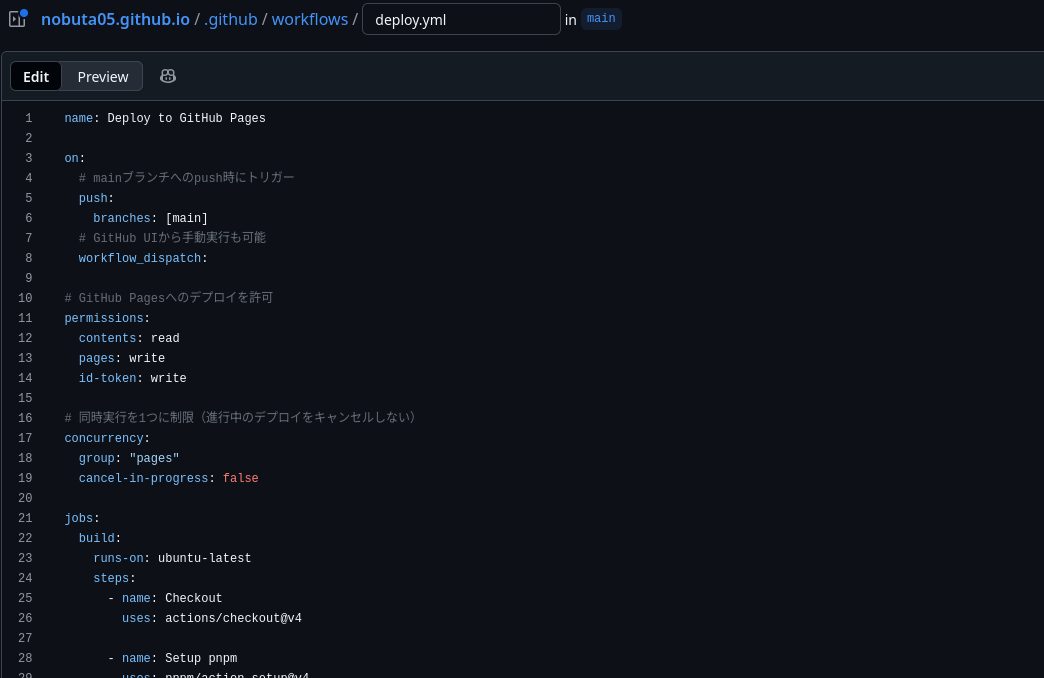
-
Enter
.github/workflows/deploy.ymlin the top box in Figure 9.-
The
deploy.ymlpart may differ from the file name generated by the AI agent. Any file name will work, sodeploy.ymlis fine.
-
-
Copy and paste the contents of the generated file into the large text area
-
Press the Commit changes… button on the far right
-
A text box will pop up, but press the Commit changes button without changing anything in particular
When completed, press Code in the top tab to return to the repository top page.
5.4.6. Operation Check of GitHub Actions
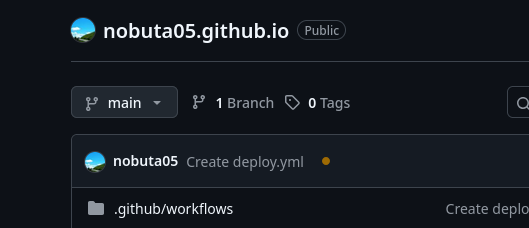
All that’s left is to wait. If a yellow circle icon is displayed as in Figure 10, it means that the process is running. If you wait a while and reload the page, it will change to a green check mark or a red cross mark will be displayed.
5.4.7. If a Green Check Mark is Displayed
Congratulations. The process was successful, so try accessing https://<username>.github.io (replace <username> with your account name).
The same page you saw with pnpm dev should be displayed.
5.4.8. If a Red Cross Mark is Displayed
Unfortunately, the process failed. In that case, if you press Actions in the top tab, a list of executed processes will be displayed. Clicking on the latest one will display various information, and an error message will be displayed in the section called Annotations, so copy this and give it to the AI agent as a prompt. It will suggest a correction plan.
5.5. Repository Deletion
There is basically no problem leaving it public forever, but let’s also write down how to clean up by deleting it. That said, nothing is difficult.
-
Press Settings on the far right of the top tab
-
Scroll to the bottom of the page and press Delete this repository written in red text
-
Proceed according to the guidance, enter the repository name for confirmation, and press the button
This will delete it completely.
6. Summary
I introduced that by using AI agents like this, you can reach the level where you can publish a web page without writing code directly. Of course, it does not mean that a perfect thing can be created, and it is better to have programming ability to improve the quality of the generated product, but I think that personal page creation will be a good subject for those who do not program on a daily basis as an opportunity to get used to Git/GitHub and AI agents.
Looking back honestly, the setup part is not broken down properly for non-engineers, and for engineers, I feel that it has become a halfway article because I only provided information that Astro is good, but I hope that this article will expand your activities even a little.